Translate

Showing posts with label Terrain. Show all posts

Wednesday, 9 November 2016

The making of a weapons stash

Hello again!!

Those eagle-eyed viewers out there, will have noticed an objective marker that featured in the last battle I played and it was used it to represent a weapons stash.

It consists of two spear barrels, a crate, some shields and other weapons strewn across the floor, with the idea to use it as a point where a friendly soldier could exchange their weapons or armour provided they were close enough to it.

The main parts that you would need to construct this weapon stash are:

Crate (Made as shown in LOTR battle games in Middle Earth pack 13)
Barrels x 2 (Made as shown in LOTR battle games in Middle Earth pack 13 and 27)
Plastic weapons objective (Taken from the ruins of middle earth sprue)
60mm base
Sand
Dark brown and Black spray paints
Other GW paint colours as mentioned below


Barrel constrcution


The process for making crates and barrels is taken from LOTR battle games in Middle Earth pack 13 and detailed below.


1. Cut a piece of dowel into inch/2.5cm long sections.

2. Smooth of the top and bottom edges until suitably rounded with sandpaper.

3. Cut grooves at regular intervals around the circumference of the barrel (I did this using a knife), do not cut the grooves too deep they are only to show where the 'slats' of the barrel join each other.

4. Cut out two thin strips of card (Mine were approx. 3mm x 50mm and 1mm thick) and glue to near the top and the bottom of the barrel to represent iron banding.

5. Glue sectioned cocktail sticks to the top of the barrel, these will be painted and used to represent spears.


Crate construction

1. Crates can be made quite simply by gluing square or rectangular sections of balsa wood together into a cuboid shape, trimming with a knife where required any overhang off.

2. Use a pair of scissors or blunt pencil to score lines, to suggest planks, into the balsa wood.

3. Glue strips of thin card, like before near either end of the crate.


The finished barrels and crate with other items
to make the weapons stash.
After these have been constructed, they are glued to the
60mm base with any other suitable items that will fit.
Glue is applied to the surface and sand poured over.
Once the glue has dried the sand and other items to the
base, it is sprayed with a basecoat of black.
Once the basecoated feature is dry it is then sprayed
with a dark brown.
Although mine is a much lighter shade of brown, the aim is to
reduce the amount of hand painting required.
I also took the opportunity to coat other terrain features in brown.
And basecoat some other figures too.
Once this layer has dried, the piece can then be paint in more specific colours for each individual feature.

Progressive highlighting was used outline the top of the
barrels to show were the inside rim is compared to the
outside edge, notice how the inside remains unpainted/
unhighlighted after a Rhinox hide wash is applied.


Barrel/crate wood and spear shafts - Rhinox Hide wash, Rhinox Hide to Mournfang Brown to Steel Legion Drab:

Drybrushing (2:1:0)(1:1:0).

Highlighting between the wooden slats (1:2:0)(0:1:0)(0:2:1)(0:1:1)(0:1:2)(0:0:1).


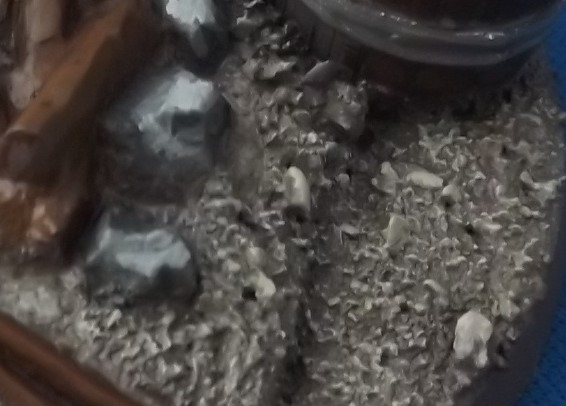
Base/ground - Steel Legion Drab to Ushabti Bone, Drybrushing (1:0)(2:1), Light drybrushing (1:1)(0:1)


Grey stones - Dawnstone to White Scar (1:0) coat then progressive highlights at (2:1)(1:1)(1:2)


Shields - Khorne red to Evil Sunz Scarlet and Dark angels green to Warpstone Glow (1:0)(1:1)(0:1)

Shield bosses - Two coats of Gehenna's gold


Iron banding and spear/axe heads - Highlights of Dawnstone then of Iron breaker.


Thus painting the features like so makes the entire thing look like:


This has turned out much better than I had anticipated. The brown spray was much lighter than I had expected so most of the browns had to be washed darker initially before, and the iron banding colour choices were a bit of a compromise from not having enough metallic colours and thinking it might look good? 

Also I've chosen not to flock it as it looks good enough anyway. But overall I happy with the result :) .

Until then

Fish

Monday, 15 September 2014

Preparing the defences

Having looked through the scenarios in the Siege of Gondor book, four require 48'' worth of stone wall sections. Now I only have 24'' at best, with the gate section and two towers.

This meant assembling three 6'' section and a tower, to make the bare minimum 47'':

Lots of Card!
The old and new
The finished ensemble

The size of the wall section is 16cm x 9.5cm x 6 cm , with the front barrier rising 12cm above the ground


Secondly a hasty siege tower was built, not much in comparison to the first one:


Wall-side view
The back slopes downward, cursed Orc engineering!


With that sorted, Sauron can finally unleash his hordes on Gondor...


Until then


Fish

Wednesday, 10 July 2013

Wooden Palisade 2

Last time I made straight sections of palisade, well the magazine contains more than that.
So to come are:
  • Corner sections 
  • The gate-section
Meaning a square fort can be fully assembled.

Corners

Cut out a circle from a piece of card using a pair-of-compasses and a knife, the radius should have be the same as the width of a wall section 2''/5cm.

Cut the circle into four sections.

Cut out a piece of polystyrene 1''/2.5cm wide and tall, and leaves the same gap between the corner and the start of the polystyrene, then glue to card base.

Cut out spikes 2''/5cm tall and shorter ones at 1.5''/3cm tall (same as was done for the wall sections) and glue to polystyrene and base.

Glue down a triangle of card then scored balsa wood in the corner, or two layers of matchsticks.

Press and glue halved cocktail sticks into the polystyrene.


Gateway

Cut out a 12''/30cm by 2''/5cm of card as a base


Cut out two pieces of polystyrene, 1''/2cm by 1''/2cm by 1.5''/3.5cm , and trim them in half to create the effect of angular packed earth.

Glue to either side of the base.


Glue 2''/5cm spiked skewers and 1.25''/3cm flat-ended skewers behind the polystyrene

The door

Cut out a piece of thin card 1.75''/4.5cm by 1.75''/4.5cm. Then into halves.


Cut out spiked skewers approximately 2.5''/6cm long and glue to front of the card

Cut out four square balsa wood posts 2.75''/7cm tall and 0.5''/1cm wide (two for each side)


Cut out four pieces of paper 1.5''/4cm by 0.5cm. Glue to top and bottom of each door to make hinges.


Glue 1.75''/4.5cm flat-ended skewers to the back of the cards.
Glue the posts onto the ends of the paper hinges.
Remember not to cover all of the paper else the door won't open.
Leave a gap between the bottom of the door and the bottom of the posts.


Trim the polystyrene if needed so both posts and the doors will fit.


Glue down card then scored balsa wood (or matchsticks) for floorboards around the spiked fence-and through the gap.
Then glue in the posts. If they don't stand sturdily glue skewers across the top to attach both posts.


The completed fort:


I think that my one turned out pretty well, at least better than I imagined.
Although the floorboards only support 80% of an inch base, so next time I would increase the width of the base.
Also I would round off the polystyrene to create a more realistic effect. 

Anyway I hoped you learnt something there. It still needs to be undercoated and painted, like before, I'll wing it :)

Until then

Fish

Sunday, 7 July 2013

Board work 4

Well I finally decided to tuck into the third board

Although rather unlike the other two I glued patches of sand, not an entire board's worth.

Here it is:


I noticed that in the plans I designed a road system, which seems to have been replaced by huge amounts of sand OOPs :( .

I did a spraying session, which might have included orcs and some other terrain features, but the can ran out just before I finished spraying this board section. 
So one patch looks more sandy than black.


Definitely will have to get some more spray paint, for the final square of board, orcs, the Shadowlord and other terrain features.

Until then

Fish

Thursday, 30 May 2013

Wooden palisade

More recently I've been focusing on Gondor in flames, here's a break from the action:

As shown in Battle games in middle-earth 27.

In case you don't have an issue here's the rough process:


Cut out a piece of card 12"/30cm by 2"/5cm, although I've used 2"/5cm by 6"/14cm as my sheet of card wasn't big enough


Cut out a 1"/2cm by 1"/2cm by 12"/30cm section of polystyrene (triangular prism)


Glue to the front of the card base

At this point the magazine made the fire-step, but I had already continued with the fence spikes at this point :S


Cut barbecue skewers into 5cm and 3cm lengths and glue against the earthworks


Cut out a piece of foam board 1"/2cm by 12"/30cm and glue behind the wooden spikes, then glue a thin scored sheet of balsa wood of similar size above it to look like boarding.

My fire-step was made of lots of matchsticks


Glue halved cocktail sticks to the front of the earthworks, around 2 per inch of palisade.


Giving a total of 36 inches of fortified ground. I'm quite pleased with the result, although I was surprised that not many other attempts are shown at all on the blog-o-sphere. 

If you know of a website or blog that has done something similar, I'd be pleased to look at it. 

Now all that's left is to paint this piece, the magazine doesn't suggest a paint scheme so I'll just wing it :)

Until then

Fish

Total Pageviews

Powered By Blogger