A fond hello from me to you!
In the past 18months, posts on here have been infrequent and less organised that I would like. Mainly because other hobbies, university coursework, exams and generally trying to become a somewhat functional adult has become ever present.
So this Blog has been pushed to one side. Yet I still enjoy gaming, modelling, painting and rule making, that hasn't and won't change. But since things have changed, such that I can't guarantee to play, paint, model and post about it as regularly. Which, for me, ruins the idea of the blog I want to create.
Over the past five years there has been some work that I am particularly proud of: Recreating the journey of the fellowship of the ring through Moria, painting serpent guards, making a fort, modelling citadel guard, I could go on...
One of the main reasons that this Blog has continued is because of followers, although it doesn't have a huge following like other Blogs, I'm glad that those who are have taken the time to view whatever mad idea strikes me next.
So lastly I just wanted to say thanks to those who have been watching and may the dice gods be ever in your favour!
Until then
Fish
Friday, 9 December 2016
Wednesday, 9 November 2016
The making of a weapons stash
Hello again!!
Those eagle-eyed viewers out there, will have noticed an objective marker that featured in the last battle I played and it was used it to represent a weapons stash.
It consists of two spear barrels, a crate, some shields and other weapons strewn across the floor, with the idea to use it as a point where a friendly soldier could exchange their weapons or armour provided they were close enough to it.
The main parts that you would need to construct this weapon stash are:
Crate (Made as shown in LOTR battle games in Middle Earth pack 13)
Barrels x 2 (Made as shown in LOTR battle games in Middle Earth pack 13 and 27)
Plastic weapons objective (Taken from the ruins of middle earth sprue)
60mm base
Sand
Dark brown and Black spray paints
Other GW paint colours as mentioned below
Barrel constrcution

The process for making crates and barrels is taken from LOTR battle games in Middle Earth pack 13 and detailed below.

1. Cut a piece of dowel into inch/2.5cm long sections.
2. Smooth of the top and bottom edges until suitably rounded with sandpaper.
3. Cut grooves at regular intervals around the circumference of the barrel (I did this using a knife), do not cut the grooves too deep they are only to show where the 'slats' of the barrel join each other.
4. Cut out two thin strips of card (Mine were approx. 3mm x 50mm and 1mm thick) and glue to near the top and the bottom of the barrel to represent iron banding.
5. Glue sectioned cocktail sticks to the top of the barrel, these will be painted and used to represent spears.
Crate construction
1. Crates can be made quite simply by gluing square or rectangular sections of balsa wood together into a cuboid shape, trimming with a knife where required any overhang off.
2. Use a pair of scissors or blunt pencil to score lines, to suggest planks, into the balsa wood.
3. Glue strips of thin card, like before near either end of the crate.
Once this layer has dried, the piece can then be paint in more specific colours for each individual feature.
Barrel/crate wood and spear shafts - Rhinox Hide wash, Rhinox Hide to Mournfang Brown to Steel Legion Drab:
Drybrushing (2:1:0)(1:1:0).
Highlighting between the wooden slats (1:2:0)(0:1:0)(0:2:1)(0:1:1)(0:1:2)(0:0:1).

Base/ground - Steel Legion Drab to Ushabti Bone, Drybrushing (1:0)(2:1), Light drybrushing (1:1)(0:1)
Grey stones - Dawnstone to White Scar (1:0) coat then progressive highlights at (2:1)(1:1)(1:2)

Shields - Khorne red to Evil Sunz Scarlet and Dark angels green to Warpstone Glow (1:0)(1:1)(0:1)
Shield bosses - Two coats of Gehenna's gold

Iron banding and spear/axe heads - Highlights of Dawnstone then of Iron breaker.
Thus painting the features like so makes the entire thing look like:


This has turned out much better than I had anticipated. The brown spray was much lighter than I had expected so most of the browns had to be washed darker initially before, and the iron banding colour choices were a bit of a compromise from not having enough metallic colours and thinking it might look good?
Also I've chosen not to flock it as it looks good enough anyway. But overall I happy with the result :) .
Until then
Fish
Those eagle-eyed viewers out there, will have noticed an objective marker that featured in the last battle I played and it was used it to represent a weapons stash.
It consists of two spear barrels, a crate, some shields and other weapons strewn across the floor, with the idea to use it as a point where a friendly soldier could exchange their weapons or armour provided they were close enough to it.
The main parts that you would need to construct this weapon stash are:
Crate (Made as shown in LOTR battle games in Middle Earth pack 13)
Barrels x 2 (Made as shown in LOTR battle games in Middle Earth pack 13 and 27)
Plastic weapons objective (Taken from the ruins of middle earth sprue)
60mm base
Sand
Dark brown and Black spray paints
Other GW paint colours as mentioned below
Barrel constrcution

The process for making crates and barrels is taken from LOTR battle games in Middle Earth pack 13 and detailed below.

1. Cut a piece of dowel into inch/2.5cm long sections.
2. Smooth of the top and bottom edges until suitably rounded with sandpaper.
3. Cut grooves at regular intervals around the circumference of the barrel (I did this using a knife), do not cut the grooves too deep they are only to show where the 'slats' of the barrel join each other.
4. Cut out two thin strips of card (Mine were approx. 3mm x 50mm and 1mm thick) and glue to near the top and the bottom of the barrel to represent iron banding.
5. Glue sectioned cocktail sticks to the top of the barrel, these will be painted and used to represent spears.
Crate construction
1. Crates can be made quite simply by gluing square or rectangular sections of balsa wood together into a cuboid shape, trimming with a knife where required any overhang off.
2. Use a pair of scissors or blunt pencil to score lines, to suggest planks, into the balsa wood.
3. Glue strips of thin card, like before near either end of the crate.
 |
| The finished barrels and crate with other items to make the weapons stash. |
 |
| After these have been constructed, they are glued to the 60mm base with any other suitable items that will fit. |
 |
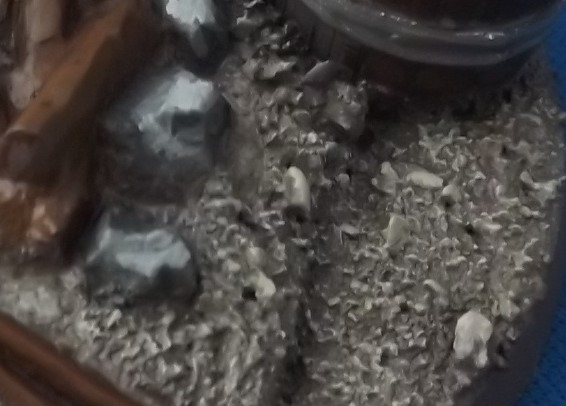
| Glue is applied to the surface and sand poured over. |
 |
| Once the glue has dried the sand and other items to the base, it is sprayed with a basecoat of black. |
 |
| Once the basecoated feature is dry it is then sprayed with a dark brown. |
 |
| Although mine is a much lighter shade of brown, the aim is to reduce the amount of hand painting required. |
 |
| I also took the opportunity to coat other terrain features in brown. |
 |
| And basecoat some other figures too. |
 |
| Progressive highlighting was used outline the top of the barrels to show were the inside rim is compared to the outside edge, notice how the inside remains unpainted/ unhighlighted after a Rhinox hide wash is applied. |
Barrel/crate wood and spear shafts - Rhinox Hide wash, Rhinox Hide to Mournfang Brown to Steel Legion Drab:
Drybrushing (2:1:0)(1:1:0).
Highlighting between the wooden slats (1:2:0)(0:1:0)(0:2:1)(0:1:1)(0:1:2)(0:0:1).
Base/ground - Steel Legion Drab to Ushabti Bone, Drybrushing (1:0)(2:1), Light drybrushing (1:1)(0:1)
Grey stones - Dawnstone to White Scar (1:0) coat then progressive highlights at (2:1)(1:1)(1:2)

Shields - Khorne red to Evil Sunz Scarlet and Dark angels green to Warpstone Glow (1:0)(1:1)(0:1)
Shield bosses - Two coats of Gehenna's gold

Iron banding and spear/axe heads - Highlights of Dawnstone then of Iron breaker.
Thus painting the features like so makes the entire thing look like:


This has turned out much better than I had anticipated. The brown spray was much lighter than I had expected so most of the browns had to be washed darker initially before, and the iron banding colour choices were a bit of a compromise from not having enough metallic colours and thinking it might look good?
Also I've chosen not to flock it as it looks good enough anyway. But overall I happy with the result :) .
Until then
Fish
Monday, 24 October 2016
Battle companies tournament - Final battle!
After five rounds of battling all five companies have taken a share of either victory or disappointment. To decide who will be become the greater of these companies they will fight in one final battle...
This battle is special in several ways, the winner of this does not become the overall winner but will be an opportunity to gain more points. Gaining points is achieved by breaking enemy companies, securing objectives, etc... and these points will be added to the table, which stands like so:
This battle is special in two more ways. Firstly all companies will be involved and will fight to the death (essentially) for the control of several objectives.
Further to this, in order to make all companies involved to be more aggressive, rather than becoming defensive but not spoil any chances of victory in doing so I've introduced an new enemy...
Gulavhar!
He'll be placed in the centre, and can only engage models that either:
- Intrude within 12''/28cm of him.
- Engage in direct combat with him.
- Hit Gulavhar with a ranged attack.
Gulavhar will continue to engage any model that does any of these things until they are killed (at which point he returns to the centre of the board).
However, to prevent Gulavhar from killing off too many models, and generally being overpowered compared to the other heroes and warriors present, the values from his might will and fate are considered zero for the purposes of this scenario.
Fairly simply this scenario is: Kill Gulavhar!
Aside from this objective, companies may gain points through the following ways:
With all that sorted, to the Fighting!!!!!!!
Kill Gulavhar!
And with Gulavhar dead, the objectives are secured as follows:
Now onto the scores:
Rohan = 4 pts(kill Gulavhar) + 2pts(kill 2 isengard heroes) + 2pts(securing weapons stash) + 2 pts(breaking Isengard company) = 10 pts
Isengard = 0 pts
Harad = 3pts(killing Gondor hero, 2 goblin heroes) + 2 pts(breaking Moria company) = 5 pts
Moria = 1pt(killing Harad hero) + 2pts(breaking Haradrim company) + 1pt(objective) = 4 pts
Gondor = 1pt(killing Harad hero) + 1pt(objective) = 2 pts
Well, that could have gone either way, the Gondorians became very isolated so had to trek over half the boards length to stand a chance of getting any points (or face gulavhar).
Meanwhile the Goblins and Haradrim engaged in a death match with got them 8pts in total, but the Haradrim got the better of them (5pts to 3pts) in that case, which naturally works in both of their favours. The Haradrim were not going to win, but got points to save face, meanwhile the goblins got more points than the Gondorians.
The Rohirrim had a stellar battle, chewing through the uruk-hai like they weren't even there, they even got the killing blow on Gulavhar, will these points be enough though? Both those two companies used the weapons stash like I intended it, using it to improve armour and silly weapons that they wouldn't have otherwise in a situation you wouldn't expect...
This battle leaves the table looking like this.
The Rohirrim gained a lot of points in that last battle, but even so it was not enough to take them above the Haradrim, who are there on points alone.
The Uruk-hai remain unmoved but gain a little more experience.
Between the Gondorians and Moria though, that last battle has allowed the goblins to leapfrog them by a single point, the worst part is that this situation could be the other way around had the roll for the last objective gone the other way...
This means the Goblins have won! It involved a lot of outnumbering and concentrating on objectives rather than kills in some battles and vice versa in others.
I hope you've enjoyed following this mini-campaign, it's taken a while to post up some of the parts due to many of my other commitments, but it has been worth it.
Until then
Fish
This battle is special in several ways, the winner of this does not become the overall winner but will be an opportunity to gain more points. Gaining points is achieved by breaking enemy companies, securing objectives, etc... and these points will be added to the table, which stands like so:
| Company | Battles | Inf. | pts | EXP (H) |
| Gondor | 4 | 13 | 21 | 30 |
| Moria | 4 | 19 | 20 | 16 |
| Isengard | 4 | 8 | 15 | 14 |
| Harad | 4 | 0 | 6 | 9 |
| Rohan | 4 | 0 | 0 | 13 |
This battle is special in two more ways. Firstly all companies will be involved and will fight to the death (essentially) for the control of several objectives.
Further to this, in order to make all companies involved to be more aggressive, rather than becoming defensive but not spoil any chances of victory in doing so I've introduced an new enemy...
Gulavhar!
He'll be placed in the centre, and can only engage models that either:
- Intrude within 12''/28cm of him.
- Engage in direct combat with him.
- Hit Gulavhar with a ranged attack.
Gulavhar will continue to engage any model that does any of these things until they are killed (at which point he returns to the centre of the board).
However, to prevent Gulavhar from killing off too many models, and generally being overpowered compared to the other heroes and warriors present, the values from his might will and fate are considered zero for the purposes of this scenario.
Fairly simply this scenario is: Kill Gulavhar!
Aside from this objective, companies may gain points through the following ways:
- Dealing the killing blow to Gulavhar (4 points).
- Securing objectives that are placed around the board (which is as simple as having more models than opposing companies within 3''/8cm in the end phase of the turn in which Gulavhar is killed) 1 point is given for standard objectives and 2 points for the weapons stash.
- Breaking an enemy company (2 points).
- Removing an enemy hero from the field (1 point).
With all that sorted, to the Fighting!!!!!!!
Kill Gulavhar!
 |
| Setup. Gulavhar centre, Rohirrim southern edge, Moria eastern edge, Gondor western edge, Haradrim northern edge and the Uruk-hai on the south eastern edge. |
 |
| The uruks make headway towards the weapons stash, hoping to secure some better equipment early on. |
 |
| The gondorians make their way towards the Haradrim and they send a lone archer to secure another of the objectives. |
 |
| The goblins also move to attack the Haradrim, and further secure an objective. Clearly both major contenders are seeking for easy points... |
 |
| There is a brief exchange of arrows, the Rohirrim decide the weapons stash is fighting for after all! |
 |
| The goblins infiltrate and prepare to fire on the Haradrim... |
 |
| The Gondorians are somewhat isolated, being the strongest of the five companies no-one wants to fight them |
 |
| First Blood! The rider of Rohan hits an uruk archer in the eye! |
 |
| The Gondorian Knights are preparing to charge as a melee breaks out near the house. |
 |
| Add caption |
 |
| The uruks help themselves to heavy armour, shields and throwing spears, much to the surprise of the Rohirrim. |
 |
| Yet Eogar sniggers, ordering a volley of spears himself bringing down two uruk-hai and leaving the uruk-hai forces broken! |
 |
| Meanwhile Abaan also orders a volley, that takes down two goblins! But this allows Radmuz to slash wildly at him, unable to back away he falls bloodied to the floor. |
 |
| Radmuz then sees the opportunity and calls the goblins to engage the
Haradrim, while the Gondorian knights crash into their rear!
|
 |
| Back at the weapons stash, Eogar and the Rohirrim have sounded the charge on a broken uruk-hai line... |
 |
| Yet one Rider got too cocky, straying ever too close to the winged fury of Gulavhar! |
 |
| The Gondorian knights easily crush one of their foes each. The Haradrim raider even manages to cut down a goblin hero! Meanwhile Radmuz also decapitates a nearby speaman. |
 |
| Naturally, Gulavhar scythes through the rider of Rohan spilling blood and limbs everywhere. Despite the ample supply of blood and bone flying around Eogar stays strong and punches Gazlur into submission. |
 |
| The Rohirrim now control the weapons stash, Eogar orders his men to fight the beast while he finishes off the remaining uruk. |
 |
| With both the Haradrim and Goblins reduced, Radmuz orders his minions to stand fast and they engage grumpily. |
 |
| The Rohirrim manage to push Gulavhar back! The Royal guard thrusts his spear into one of his wings and he shrieks in pain. |
 |
| Radmuz' scampers up and dances around both knights and slices both horses from beneath them! |
 |
| With only Gulavhar to fight the men of rohan take up heavy armour, throwing spears and two-handed axes! Eogar orders another charge...But only the royal guard can stomach fighting the beast! |
 |
| The Gondorian infantry has arrived! only to find the Haradrim and Goblins, who were at each others throats a moment ago double-teaming them! |
 |
| Gulavhar swipes at the guard, helpless to defend himself again the fiends' vengance! And so his crumpled body lays on the floor. |
 |
| Ingold and his men are pushed back with losses, a Harad archer cuts down one of their knights. And another goblin spear is hoof-ed in the face. |
 |
| Eogar and co. summon the courage to charge Gulavhar again! |
 |
| Radmuz calls another huge stand fast! and the goblins engage both Haradrim and Gondorian alike seeing the battle hanging in the balance... |
 |
| The Gondorians blithely turn aside the enemies attacks, Ingold spears the raider in the stomach and he groans as he hits the floor. While his guard outmatches a goblin a knocks him out. |
 |
| Just as the fight by the house becomes one-sided Gulavhar becomes trapped between Rohirrim shiedl armour and shiny two-handed axes that dig deep into his hide! Gulavhar screams, ascends to the heavens and far off into the night.... |
 |
| The lone Gondorian archer secures this objective. |
 |
| With one person each the goblins and Gondorians roll off to see who claims this objective... |
Rohan = 4 pts(kill Gulavhar) + 2pts(kill 2 isengard heroes) + 2pts(securing weapons stash) + 2 pts(breaking Isengard company) = 10 pts
Isengard = 0 pts
Harad = 3pts(killing Gondor hero, 2 goblin heroes) + 2 pts(breaking Moria company) = 5 pts
Moria = 1pt(killing Harad hero) + 2pts(breaking Haradrim company) + 1pt(objective) = 4 pts
Gondor = 1pt(killing Harad hero) + 1pt(objective) = 2 pts
Well, that could have gone either way, the Gondorians became very isolated so had to trek over half the boards length to stand a chance of getting any points (or face gulavhar).
Meanwhile the Goblins and Haradrim engaged in a death match with got them 8pts in total, but the Haradrim got the better of them (5pts to 3pts) in that case, which naturally works in both of their favours. The Haradrim were not going to win, but got points to save face, meanwhile the goblins got more points than the Gondorians.
The Rohirrim had a stellar battle, chewing through the uruk-hai like they weren't even there, they even got the killing blow on Gulavhar, will these points be enough though? Both those two companies used the weapons stash like I intended it, using it to improve armour and silly weapons that they wouldn't have otherwise in a situation you wouldn't expect...
This battle leaves the table looking like this.
| Company | Battles | Inf. | pts | EXP (H) |
| Moria | 5 | 19 | 24 | 24 |
| Gondor | 5 | 13 | 23 | 39 |
| Isengard | 5 | 8 | 15 | 16 |
| Harad | 5 | 0 | 11 | 14 |
| Rohan | 5 | 0 | 10 | 23 |
The Uruk-hai remain unmoved but gain a little more experience.
Between the Gondorians and Moria though, that last battle has allowed the goblins to leapfrog them by a single point, the worst part is that this situation could be the other way around had the roll for the last objective gone the other way...
This means the Goblins have won! It involved a lot of outnumbering and concentrating on objectives rather than kills in some battles and vice versa in others.
I hope you've enjoyed following this mini-campaign, it's taken a while to post up some of the parts due to many of my other commitments, but it has been worth it.
Until then
Fish
Subscribe to:
Posts (Atom)
