Hi again,
Never guess what I have in store for you? Another campaign. A 'little' less farfetched than the previous one, in fact, could be quite fitting in the Tolkien universe.
PDF - The City
This story is more convincing, but I've tried to emphasise that the city was significant for a small period of time, but that its people were scattered after a number of horrors and refused to explain their travels because of their grievances, so effectively no-one would mention where they came from and therefore future generations would not remember it.
Is it perhaps a touch depressing? Yes.
Does it have to be that way to make the story work? Also yes.
Have I included a couple of new characters? Yes.
Have I also attached a small fan fiction piece with it? Yes.
Is there a map of the layout of the city because I though it would be nice rather than making generic houses and dumping them randomly down on a field? Yes.
I should note I'll be posting a PDF with the profiles of all the heroes in the campaigns, largely they are normal captains but with an extra point of might/will/courage and maybe the equipment type change here and there.
There are still two more campaigns to come, comments and feedback are duly welcome.
Until then
Fish
Thursday 31 May 2018
Tuesday 17 April 2018
Something from the past...
Hello there!
Bet you weren't expecting a post on here? It has been a while and though I shan't be returning to the world of SBG anytime immediately. However, this is a little different.
More recently I went through some of my old fictional scenarios and rules for campaigns etc... Mostly as I was interested in making rules for scenarios, developing game concepts and to a certain extent developing ideas for campaigns. These campaign plot ideas I'd though up in 2011 or 2012 and developed bit by bit (but given I was early teens at the time, they had as many plot holes as a block of swiss cheese), naturally I'd been meaning at some point to write them up or share with some other people. But...that didn't happen.
So really, I'm sharing some funky ideas for campaigns in Middle-earth I've come up with. Compared to what they were initially they are soooooo much better, some creases have been smoothed out (particularly in the case of the background to the campaigns and some of the special rules).
These scenarios are designed to be played for the primary victory conditions, but points are awarded for achieving secondary victory conditions to encourage hard fought battles and that each objective is important in the grand scheme of things (5pts for primary and 2pts for a secondary). The scores and victories are tabulated at the end to see which player has the most points or most victories if the players are tied (when the players are within two points of each other).
PDF - Journey to Harad
This one is the funky one, Initially I had it as Glorfindel rescuing the elven companies, but that seemed a 'touch' unrealistic. Tbh the idea is a bit farfetched, but the thought of elves fighting a Mumakil was particularly tough to pass up on, although it was hard finding a storyline to fit all the companies on and get them in the right place.
This is perhaps a lot to take in, I do have a few more supplements on the way so brace yourselves! Hope you have enjoyed this small piece. Let me know if you have any comments and such :)
Until then
Fish
Friday 9 December 2016
An announcement
A fond hello from me to you!
In the past 18months, posts on here have been infrequent and less organised that I would like. Mainly because other hobbies, university coursework, exams and generally trying to become a somewhat functional adult has become ever present.
So this Blog has been pushed to one side. Yet I still enjoy gaming, modelling, painting and rule making, that hasn't and won't change. But since things have changed, such that I can't guarantee to play, paint, model and post about it as regularly. Which, for me, ruins the idea of the blog I want to create.
Over the past five years there has been some work that I am particularly proud of: Recreating the journey of the fellowship of the ring through Moria, painting serpent guards, making a fort, modelling citadel guard, I could go on...
One of the main reasons that this Blog has continued is because of followers, although it doesn't have a huge following like other Blogs, I'm glad that those who are have taken the time to view whatever mad idea strikes me next.
So lastly I just wanted to say thanks to those who have been watching and may the dice gods be ever in your favour!
Until then
Fish
Wednesday 9 November 2016
The making of a weapons stash
Hello again!!
Those eagle-eyed viewers out there, will have noticed an objective marker that featured in the last battle I played and it was used it to represent a weapons stash.
It consists of two spear barrels, a crate, some shields and other weapons strewn across the floor, with the idea to use it as a point where a friendly soldier could exchange their weapons or armour provided they were close enough to it.
The main parts that you would need to construct this weapon stash are:
Crate (Made as shown in LOTR battle games in Middle Earth pack 13)
Barrels x 2 (Made as shown in LOTR battle games in Middle Earth pack 13 and 27)
Plastic weapons objective (Taken from the ruins of middle earth sprue)
60mm base
Sand
Dark brown and Black spray paints
Other GW paint colours as mentioned below
Barrel constrcution

The process for making crates and barrels is taken from LOTR battle games in Middle Earth pack 13 and detailed below.

1. Cut a piece of dowel into inch/2.5cm long sections.
2. Smooth of the top and bottom edges until suitably rounded with sandpaper.
3. Cut grooves at regular intervals around the circumference of the barrel (I did this using a knife), do not cut the grooves too deep they are only to show where the 'slats' of the barrel join each other.
4. Cut out two thin strips of card (Mine were approx. 3mm x 50mm and 1mm thick) and glue to near the top and the bottom of the barrel to represent iron banding.
5. Glue sectioned cocktail sticks to the top of the barrel, these will be painted and used to represent spears.
Crate construction
1. Crates can be made quite simply by gluing square or rectangular sections of balsa wood together into a cuboid shape, trimming with a knife where required any overhang off.
2. Use a pair of scissors or blunt pencil to score lines, to suggest planks, into the balsa wood.
3. Glue strips of thin card, like before near either end of the crate.
Once this layer has dried, the piece can then be paint in more specific colours for each individual feature.
Barrel/crate wood and spear shafts - Rhinox Hide wash, Rhinox Hide to Mournfang Brown to Steel Legion Drab:
Drybrushing (2:1:0)(1:1:0).
Highlighting between the wooden slats (1:2:0)(0:1:0)(0:2:1)(0:1:1)(0:1:2)(0:0:1).

Base/ground - Steel Legion Drab to Ushabti Bone, Drybrushing (1:0)(2:1), Light drybrushing (1:1)(0:1)
Grey stones - Dawnstone to White Scar (1:0) coat then progressive highlights at (2:1)(1:1)(1:2)

Shields - Khorne red to Evil Sunz Scarlet and Dark angels green to Warpstone Glow (1:0)(1:1)(0:1)
Shield bosses - Two coats of Gehenna's gold

Iron banding and spear/axe heads - Highlights of Dawnstone then of Iron breaker.
Thus painting the features like so makes the entire thing look like:


This has turned out much better than I had anticipated. The brown spray was much lighter than I had expected so most of the browns had to be washed darker initially before, and the iron banding colour choices were a bit of a compromise from not having enough metallic colours and thinking it might look good?
Also I've chosen not to flock it as it looks good enough anyway. But overall I happy with the result :) .
Until then
Fish
Those eagle-eyed viewers out there, will have noticed an objective marker that featured in the last battle I played and it was used it to represent a weapons stash.
It consists of two spear barrels, a crate, some shields and other weapons strewn across the floor, with the idea to use it as a point where a friendly soldier could exchange their weapons or armour provided they were close enough to it.
The main parts that you would need to construct this weapon stash are:
Crate (Made as shown in LOTR battle games in Middle Earth pack 13)
Barrels x 2 (Made as shown in LOTR battle games in Middle Earth pack 13 and 27)
Plastic weapons objective (Taken from the ruins of middle earth sprue)
60mm base
Sand
Dark brown and Black spray paints
Other GW paint colours as mentioned below
Barrel constrcution

The process for making crates and barrels is taken from LOTR battle games in Middle Earth pack 13 and detailed below.

1. Cut a piece of dowel into inch/2.5cm long sections.
2. Smooth of the top and bottom edges until suitably rounded with sandpaper.
3. Cut grooves at regular intervals around the circumference of the barrel (I did this using a knife), do not cut the grooves too deep they are only to show where the 'slats' of the barrel join each other.
4. Cut out two thin strips of card (Mine were approx. 3mm x 50mm and 1mm thick) and glue to near the top and the bottom of the barrel to represent iron banding.
5. Glue sectioned cocktail sticks to the top of the barrel, these will be painted and used to represent spears.
Crate construction
1. Crates can be made quite simply by gluing square or rectangular sections of balsa wood together into a cuboid shape, trimming with a knife where required any overhang off.
2. Use a pair of scissors or blunt pencil to score lines, to suggest planks, into the balsa wood.
3. Glue strips of thin card, like before near either end of the crate.
 |
| The finished barrels and crate with other items to make the weapons stash. |
 |
| After these have been constructed, they are glued to the 60mm base with any other suitable items that will fit. |
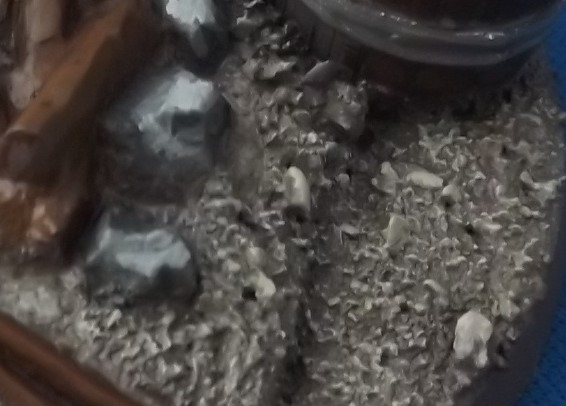
 |
| Glue is applied to the surface and sand poured over. |
 |
| Once the glue has dried the sand and other items to the base, it is sprayed with a basecoat of black. |
 |
| Once the basecoated feature is dry it is then sprayed with a dark brown. |
 |
| Although mine is a much lighter shade of brown, the aim is to reduce the amount of hand painting required. |
 |
| I also took the opportunity to coat other terrain features in brown. |
 |
| And basecoat some other figures too. |
 |
| Progressive highlighting was used outline the top of the barrels to show were the inside rim is compared to the outside edge, notice how the inside remains unpainted/ unhighlighted after a Rhinox hide wash is applied. |
Barrel/crate wood and spear shafts - Rhinox Hide wash, Rhinox Hide to Mournfang Brown to Steel Legion Drab:
Drybrushing (2:1:0)(1:1:0).
Highlighting between the wooden slats (1:2:0)(0:1:0)(0:2:1)(0:1:1)(0:1:2)(0:0:1).
Base/ground - Steel Legion Drab to Ushabti Bone, Drybrushing (1:0)(2:1), Light drybrushing (1:1)(0:1)
Grey stones - Dawnstone to White Scar (1:0) coat then progressive highlights at (2:1)(1:1)(1:2)

Shields - Khorne red to Evil Sunz Scarlet and Dark angels green to Warpstone Glow (1:0)(1:1)(0:1)
Shield bosses - Two coats of Gehenna's gold

Iron banding and spear/axe heads - Highlights of Dawnstone then of Iron breaker.
Thus painting the features like so makes the entire thing look like:


This has turned out much better than I had anticipated. The brown spray was much lighter than I had expected so most of the browns had to be washed darker initially before, and the iron banding colour choices were a bit of a compromise from not having enough metallic colours and thinking it might look good?
Also I've chosen not to flock it as it looks good enough anyway. But overall I happy with the result :) .
Until then
Fish
Subscribe to:
Posts (Atom)
