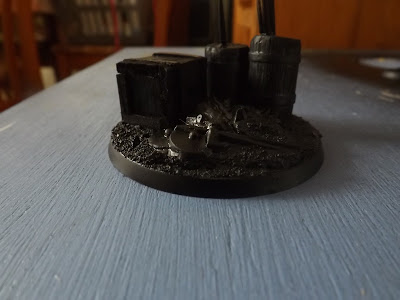
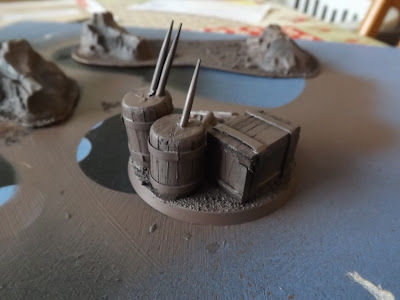
Those eagle-eyed viewers out there, will have noticed an objective marker that featured in the last battle I played and it was used it to represent a weapons stash.
It consists of two spear barrels, a crate, some shields and other weapons strewn across the floor, with the idea to use it as a point where a friendly soldier could exchange their weapons or armour provided they were close enough to it.
The main parts that you would need to construct this weapon stash are:
Crate (Made as shown in LOTR battle games in Middle Earth pack 13)
Barrels x 2 (Made as shown in LOTR battle games in Middle Earth pack 13 and 27)
Plastic weapons objective (Taken from the ruins of middle earth sprue)
60mm base
Sand
Dark brown and Black spray paints
Other GW paint colours as mentioned below
Barrel constrcution
The process for making crates and barrels is taken from LOTR battle games in Middle Earth pack 13 and detailed below.

1. Cut a piece of dowel into inch/2.5cm long sections.
2. Smooth of the top and bottom edges until suitably rounded with sandpaper.
3. Cut grooves at regular intervals around the circumference of the barrel (I did this using a knife), do not cut the grooves too deep they are only to show where the 'slats' of the barrel join each other.
4. Cut out two thin strips of card (Mine were approx. 3mm x 50mm and 1mm thick) and glue to near the top and the bottom of the barrel to represent iron banding.
5. Glue sectioned cocktail sticks to the top of the barrel, these will be painted and used to represent spears.
Crate construction
1. Crates can be made quite simply by gluing square or rectangular sections of balsa wood together into a cuboid shape, trimming with a knife where required any overhang off.
2. Use a pair of scissors or blunt pencil to score lines, to suggest planks, into the balsa wood.
3. Glue strips of thin card, like before near either end of the crate.
 |
| The finished barrels and crate with other items to make the weapons stash. |
 |
| After these have been constructed, they are glued to the 60mm base with any other suitable items that will fit. |
 |
| Glue is applied to the surface and sand poured over. |
 |
| Once the glue has dried the sand and other items to the base, it is sprayed with a basecoat of black. |
 |
| Once the basecoated feature is dry it is then sprayed with a dark brown. |
 |
| Although mine is a much lighter shade of brown, the aim is to reduce the amount of hand painting required. |
 |
| I also took the opportunity to coat other terrain features in brown. |
 |
| And basecoat some other figures too. |
Barrel/crate wood and spear shafts - Rhinox Hide wash, Rhinox Hide to Mournfang Brown to Steel Legion Drab:
Drybrushing (2:1:0)(1:1:0).
Highlighting between the wooden slats (1:2:0)(0:1:0)(0:2:1)(0:1:1)(0:1:2)(0:0:1).
Base/ground - Steel Legion Drab to Ushabti Bone, Drybrushing (1:0)(2:1), Light drybrushing (1:1)(0:1)
Grey stones - Dawnstone to White Scar (1:0) coat then progressive highlights at (2:1)(1:1)(1:2)

Shields - Khorne red to Evil Sunz Scarlet and Dark angels green to Warpstone Glow (1:0)(1:1)(0:1)
Shield bosses - Two coats of Gehenna's gold
Iron banding and spear/axe heads - Highlights of Dawnstone then of Iron breaker.
Thus painting the features like so makes the entire thing look like:
This has turned out much better than I had anticipated. The brown spray was much lighter than I had expected so most of the browns had to be washed darker initially before, and the iron banding colour choices were a bit of a compromise from not having enough metallic colours and thinking it might look good?
Also I've chosen not to flock it as it looks good enough anyway. But overall I happy with the result :) .
Until then
Fish


No comments:
Post a Comment